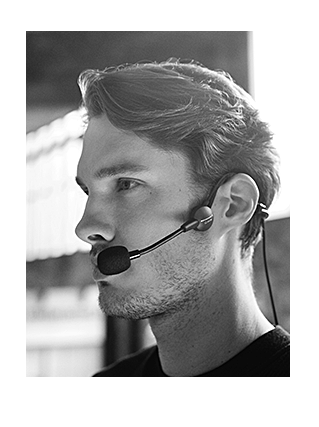
Best results are achieved when the microphone is in the optimum position for the tour guide. Here are some hints & tips for common applications and environments.
- Walking tour indoors – where the background noise level is low (like a museum or art gallery) the presenter or tour leader may talk at a normal level and the close-positioning of the headworn microphone is less critical. In fact, positioning the microphone slightly to the side of the mount to avoid any “popping” is preferable; this gives a listening experience more-like that of a radio programme. (Popping is typically heard when saying words with hard consonants, “popping, blasting”)
- Walking tour outdoors – combatting wind. Wind-noise can be reduced by close-talking into the microphone; always use the foam wind-screen, fitting an extra-large windscreen can also help. In extreme wind conditions, wear a face-covering like a scarf to further minimise wind turbulence across the microphone. Your tour guests may also benefit by using a head-covering (like the hood on a jacket) to minimise wind turbulence across their ears.
If your transmitter has an adjustable microphone volume, reduce the level so as to be sufficient transmission level when very close-talking into the microphone capsule. - Walking tour outdoors – wet weather. Do your best to keep the microphone dry. Place the pocket transmitter beneath your raincoat and ask your tour guests to do the same with the receivers. Always use the foam windscreen and at the end of the tour, remove the windscreen and place it with the microphone in a warm & dry room.
- Noisy environment like a factory tour – adjust the microphone capsule to a close-position, use a foam “pop” screen, talk in a normal voice. While it is natural to raise your own voice when talking in a noisy environment, most microphones will provide best sound quality & clarity when you speak in a normal voice and avoid shouting – let the tourguide system take the strain.
- We recommend you have a walk-test through the planned tour route with some colleagues listening as ‘guests’. First, check the microphone is positioned close to the talker’s mouth (check the microphone’s opening is facing the mouth – refer to the manufacturer’s instructions); this will ensure the microphone picks up the voice more than any background noise. Then adjust the microphone volume setting on the tourguide transmitter (refer to the instructions, or call us for help), so there is sufficient level to transmit clear speech to your listeners; if it sounds distorted (sometimes referred to as sounding “fuzzy”), then reduce the mic. volume setting until the sound is clear and/or reposition the microphone. Listeners can then adjust their own volume control to suit the environment.

A few words about “Noise-cancelling” microphones
Most headworn microphones have a unidirectional (cardioid) polar pickup pattern for superior rejection of unwanted sound. This is typical of the microphones supplied for wireless microphones and tourguide systems.
When used for close-talking, by adjusting the flexible gooseneck so the microphone head is close to the talker’s mouth, this results in minimal pick-up of background noise, (the net-result may also be referred to by some as ‘noise-cancelling’ or ‘noise-rejecting’).
True ‘noise-cancelling’ microphones have a very specific design that involves differential microphone topology and all such microphones have at least two ports through which sound enters; a front-port normally oriented toward the mouth and another port that’s more distant – such that sound arriving at similar levels to both ports will cancel, whereas sound significantly closer to one port does not cancel. Another technique uses two or more microphones and active or passive circuitry to cancel noise. These are typically found in the [more expensive] headsets with headphones that are used for talkback and two-way communication purposes (esp. extreme environments like a helicopter).
View our wide range of microphones here.

